HOW TO MAKE A FACE MASK
by Karen Million

These step-by-step instructions are for making a cloth face mask. I have based my instructions on a posting I saw from a healthcare facility which was asking for the public to create these and donate them. These are NOT N95 masks. They are made out of 2 layers flannel fabric. They should be used by anyone just wanting an extra layer of protection in lieu of nothing.
In my instructions, I am adding a piece of wrapped wire in a little sewn-in pocket which pinches around the nose for a better fit. If you do not want to add the wire, you can just skip those instructions.
In my instructions, I am adding a piece of wrapped wire in a little sewn-in pocket which pinches around the nose for a better fit. If you do not want to add the wire, you can just skip those instructions.

What you need:
* 2 pieces of flannel cotton fabric cut 6" x 9"
* 2 pieces of 1/4" wide elastic cut 6" long. (7" for XL) Wider elastic could be used but not as comfortable as 1/4" wide.* plastic wrapped wire : 3" long
* duct tape
* thread
* fabric scissors
* wire cutters
* sewing machine
* dress pins

Step 1: Cut 2 pieces of fabric at 6" x 9". Put right sides together.


Step 2: Cut the 6" lengths of elastic. They will be sewn onto the short 6" sides of the mask.
 Remember that the elastic will need to be placed on the right side of the fabric on the inside of your sewing assembly. You will place the ends of the elastic in the corners at a diagonal. But you will sew some of the seams first before you insert the elastic so don't worry about pinning in place at this time.

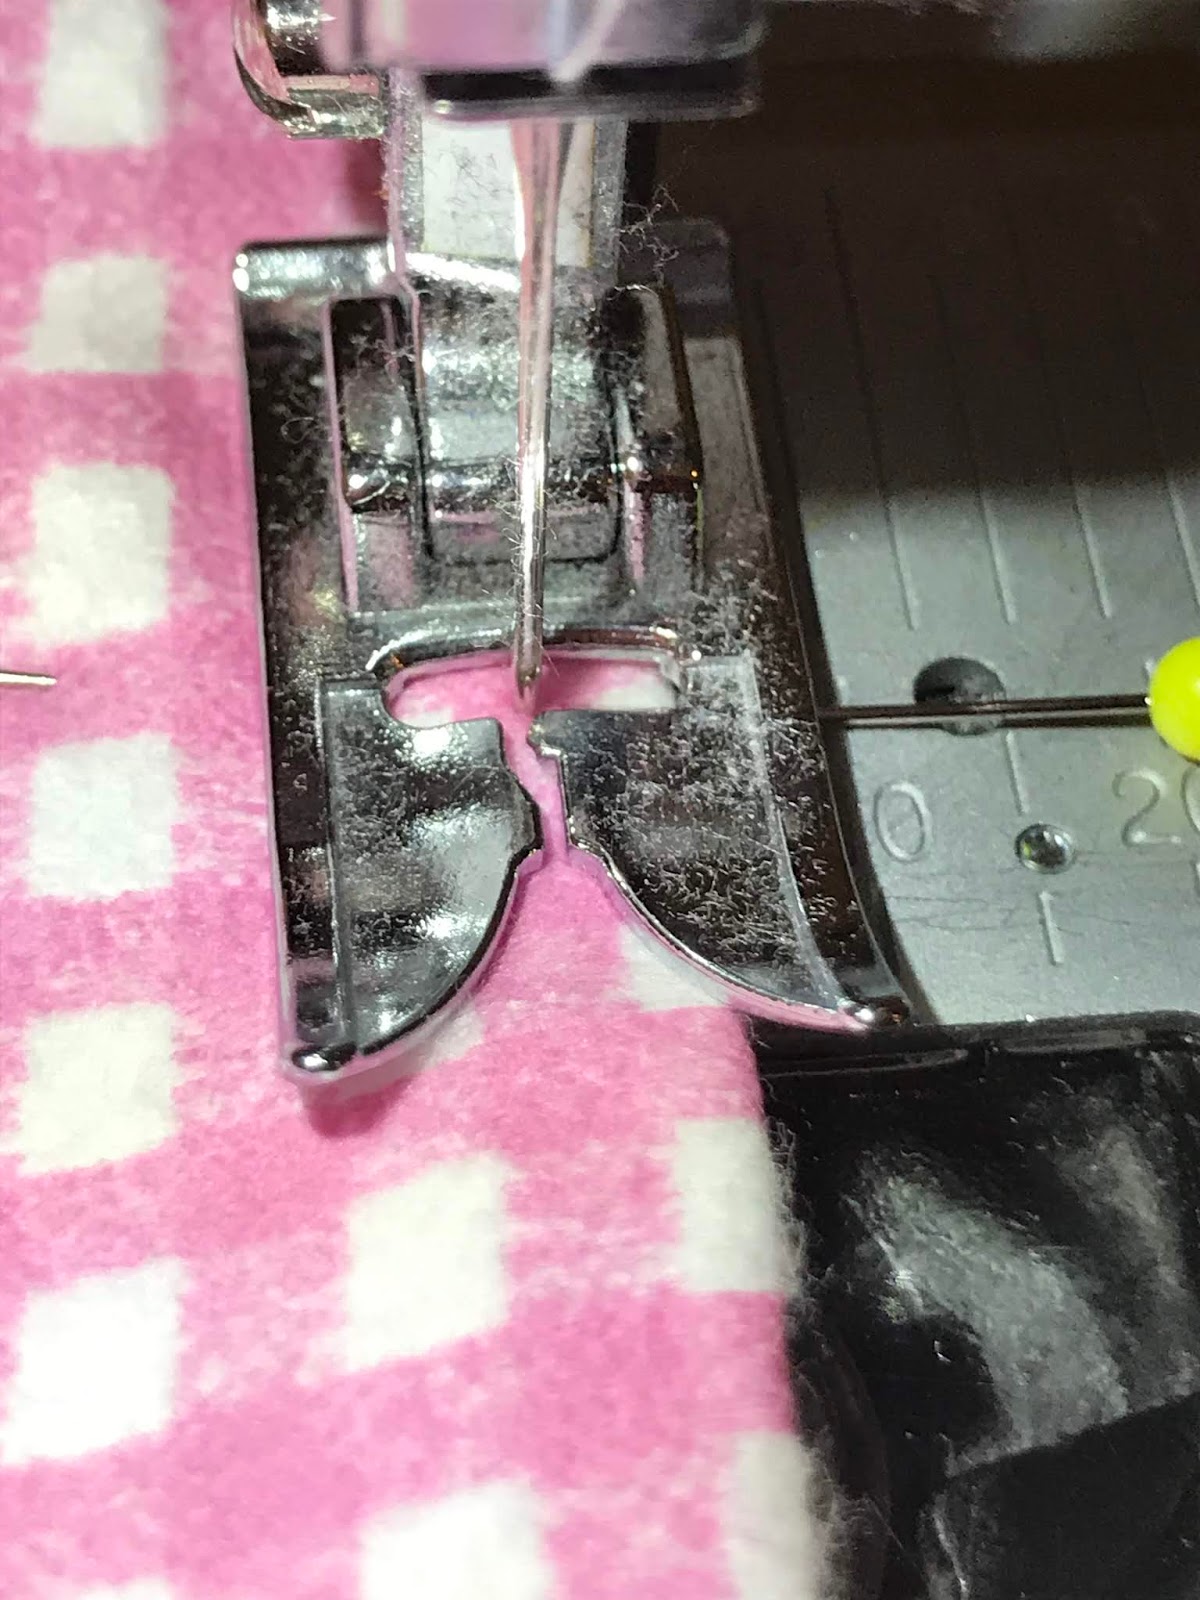
 Step 3: This picture shows the stitching that
 you will sew. Begin at the top leaving a 2" opening between the start and the end to allow you to turn the mask right side out. The corners will have a bit of a diagonal when you sew across the elastic strips (which will be placed inside). Use about 1/4" seam allowance which is the distance from the stitch to the edge of the fabric.
 This photo shows how I have placed the elastic end inside the assembly as I approach the corner on my sewing machine. I placed it at a diagonal.
Let the fabric fall back over the elastic and pivot the presser foot at 45 degree angle after you've placed the needle down into the fabric. Sew across the end of the elastic and secure it with a reverse stitch.


Now proceed to the next corner. Don't forget to reach under and get the other end of the elastic when you get within about 1" to the next corner and sew diagonally across it as you did the first corner. Continue sewing around and repeat elastic insertion techniques on the other side of the mask.

This photo shows the angled stitching at the corners to catch the elastic.
Trim the corners at all four corners.

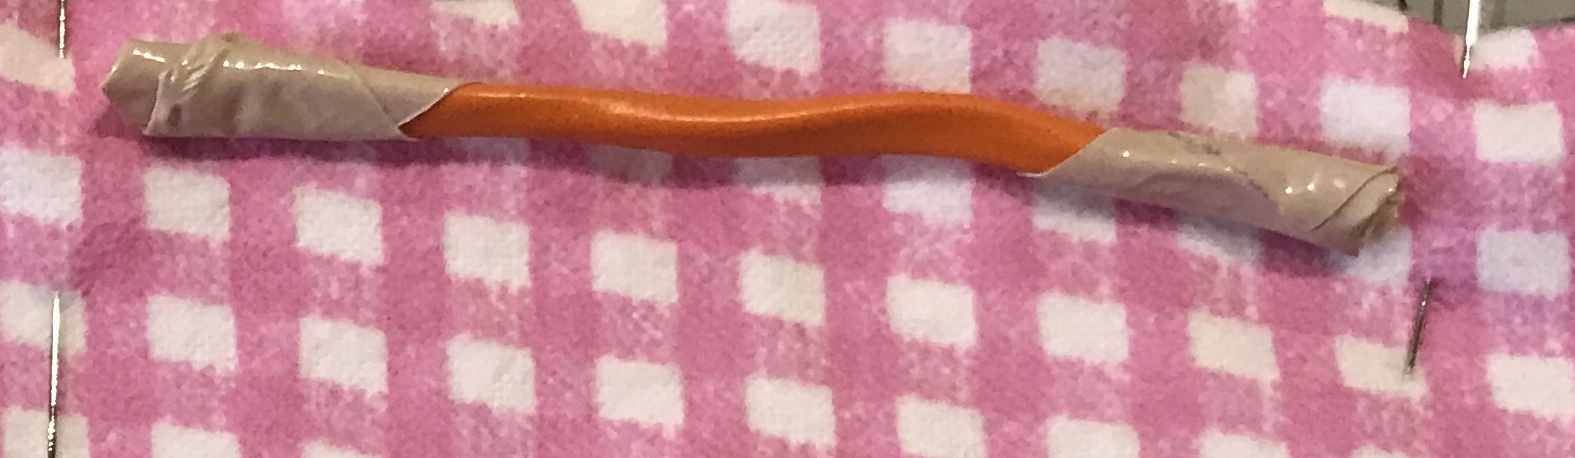
Step 4: If you are going to use a wire nose piece, make sure it is covered all around in order to seal the wires enclosed to prevent them from getting wet when washing. I used some wrapped wire and covered the ends with duct tape. This nose piece is about 3" long.
Step 5: Go through the space between the stitching and turn the mask right side out.


Step 5: Go through the space between the stitching and turn the mask right side out.

If using the nose piece, you will need to get it placed at the top of the mask inside a little pocket. I will next be top-stitching a continuous seam in order to secure the opening at the top closed, keep the nose piece in place AND create pleats at the edges so that the mask fits the face. Determine the length of the pocket needed to hold the nose piece by placing pins at the ends when you center the nose piece on the mask. Leave a little space - you don't want it to be exactly the same length.


I secured my wire inside the mask by pinning a pin around it so it doesn't slip and get in the way of the top stitching and pleat making that I will do next.


You need to just sew over the 2nd pin to leave it in place, to mark where you will make the nose piece pocket when you come back around. Tip: simply sew very slowly over the pin to make sure the needle doesn't hit the pin.
 At the corners, put the needle bar down, lift the presser foot and turn the fabric 90 degrees, put the presser foot down and continue on with a 1/4" top stitch. As you go over the pleats, press down on the left side and pull the pins out before you hit them with the needle. Allow the feed dogs to pull the fabric layers through and don't force anything while you are sewing. If the pleats slip out, stop sewing and adjust the pleats before proceeding.
 The finished pleated side.
When you get all the away around and back to the beginning of the stitching, put the needle bar down again. Lift the presser foot and turn the fabric 90 degrees. Put the presser foot back down.
 Then pinch up on your nose piece and slide it up to the top under the seam and between the presser foot and the pin you left in at the top.
 Now sew downwards at 90 degrees from the top stitching about 1/2" next to the end of the nose wire.
 Put the needle bar down again, lift the presser foot and turn the fabric 90 degrees. Put the presser foot down and sew alongside the nose piece wire making sure it doesn't go under the presser foot.

 Clip all the loose threads.
The nose piece pocket is complete. Note, if you don't want to bother with the nose piece, simply sew all the way around and skip all the references to the nose piece.

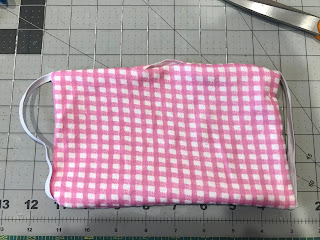
The finished mask.

Comments
Post a Comment